Set up an automated deployment pipeline
Before you deploy TapData projects across environments with GitHub and GitHub Actions, prepare the repositories, environments, credentials, and self-hosted runner that the pipeline requires. This guide is intended for operations and implementation teams.
Prerequisites
Prepare the following resources and information before you configure the pipeline:
| Resource | Requirement |
|---|---|
| GitHub organization | You have administrator access to at least one GitHub organization. The Worker repository and tenant repositories can be in the same organization. |
| TapData environments | You have at least one system integration testing (SIT) environment and one production environment. Add development, performance testing, or user acceptance testing environments as needed. |
| Internal runner host | You have at least one Linux server, Ubuntu 20.04 or later recommended, that can access GitHub and the TapData service ports for all target environments. Install git, bash, jq, and curl, and register the runner with the tapdata label. For more information, see Adding self-hosted runners. |
| Database connection details | You have obtained the connection addresses, usernames, and passwords for each environment from the database administrator. |
| Deployment approver | You have designated at least one GitHub account to approve resource imports. |
Plan the pipeline
Repository model
Automated deployment uses two types of GitHub repositories:
| Repository type | Purpose | Visibility |
|---|---|---|
| Worker repository | Stores the shared deployment scripts and reusable workflows. It is maintained by the operations team and called by tenant repositories. | Internal |
| Tenant repository | Stores TapData project configuration exported by a team or business domain. Use one tenant repository per team or business domain. | Internal or Private |
Environment model
Start with SIT and production, then add intermediate environments if your release process requires them. The following lowercase values are fixed names used by GitHub Environments and workflows:
sit: System integration testing environment. A pushed Git tag, such asv1.2.3, triggers deployment to this environment.prod: Production environment. Deployments are triggered manually from GitHub Actions. To use it, add this option toworkflow_dispatch.target_env.optionsin the tenant repository workflow.deploy: Resource import approval gate. This environment does not store credentials. It is used to pause the workflow for manual approval before connections, tasks, or APIs are imported.
If you use additional stages, create environments such as dev for development validation, lpt for performance testing, or aat for user acceptance testing. The official tenant template deploys to dev after changes are merged into main. If you do not use a dev environment, update the tenant deployment workflow so merged Pull Requests do not trigger an unconfigured environment.
Permissions and security
TapData masks sensitive fields in exported project configuration. Repositories store only business configuration. Real connection values, such as database URLs, usernames, and passwords, are stored in the corresponding GitHub Environment Secrets and Variables and are injected during deployment.
- Protect the
mainbranch in each tenant repository. Disallow direct pushes, require Pull Requests, and require code review and workflow checks before merge. - Use an independent operations approver for the
deployapproval gate. Developers should not approve their own deployment changes. - Store shared values, such as
GH_DEPLOY_TOKEN, TapData URLs, and TapData access codes, as organization-level Secrets or Variables. - Store environment-specific connection values as Environment Secrets or Variables.
Personal access token and naming rules
The GH_DEPLOY_TOKEN is used by the runner to pull deployment scripts from the Worker repository and by TapData to push configuration and create Pull Requests in tenant repositories.
Use the following permission model:
- If the Worker repository and tenant repositories are in the same organization, use a fine-grained personal access token (PAT). Grant
Contentsread access to the Worker repository, and grantContentsandPull requestsread and write access to tenant repositories. - If the repositories are in different organizations, you can use a classic PAT with the
repoandworkflowscopes.
Secrets and Variables for TapData connections use the exported TapData connection name as the lookup key, with lowercase letters converted to uppercase. The worker does not replace spaces or hyphens with underscores. For compatibility with GitHub Secrets and Variables, name TapData connections with letters, numbers, and underscores before export. For example, the connection name oracle_source uses the prefix ORACLE_SOURCE.
Initialize the pipeline
Follow these steps to turn the plan into an executable GitHub deployment pipeline.
Step 1: Create the GitHub repositories
Use a two-repository model to separate deployment logic from business configuration. The Worker repository stores the shared deployment logic. Each tenant repository stores project configuration for one team or business domain and calls the Worker repository workflows.
-
Create a copy of the official Worker repository, tapdata/tapdata-cicd-worker, in your GitHub organization. You can use Use this template or clone the repository and push it to a new repository.
Name the repository
tapdata-cicd-workerand set its visibility to Internal.The Worker repository contains deployment orchestration, rollback orchestration, and scripts that call TapData APIs:
tapdata-cicd-worker/
├── .github/workflows/
│   ├── tapdata-deploy.yml       # Core deployment workflow
│   └── tapdata-rollback.yml     # Core rollback workflow
├── conf/
│   └── Task_Run_Order.json      # Task startup order configuration
├── scripts/                     # TapData API scripts
└── tenant-template/.github/workflows/
    ├── tapdata-deploy.yml       # Tenant deployment workflow template
└── tapdata-rollback.yml # Tenant rollback workflow template -
Create a tenant repository for the business team. Use a name that matches the TapData project name when possible, for example
user-center-sync. -
In the tenant repository, add two lightweight workflow route files copied from
tenant-template/.github/workflows/in the Worker repository:tapdata-deploy.yml: Listens for exported configuration changes, such as changes under*_tapdata_export/**on themainbranch, pushed tags, and manual dispatch events. By default, it uses the tenant repository name as the TapData project name.tapdata-rollback.yml: Accepts manual rollback requests by target environment and rollback tag.
tipIn both copied workflow files, replace the
{WORKER_REPO}placeholder with the Worker repository path you created, for exampleyour-org/tapdata-cicd-worker. If the TapData project name differs from the tenant repository name, update theprojectinput. -
Commit the workflow files and push them to the
mainbranch of the tenant repository.
Step 2: Configure organization-level Secrets and Variables
Configure shared credentials and access endpoints at the organization level so GitHub Actions can connect to TapData environments.
-
Sign in to GitHub with an account that has repository permissions, and go to Settings > Developer settings > Personal access tokens.
-
Generate a token named
tapdata-deploy. Use an expiration of 90 days or less, and copy the token immediately after it is created.tipIf the Worker repository and tenant repositories are in the same GitHub organization, prefer a fine-grained PAT. Grant
Contentsread access to the Worker repository, and grantContentsandPull requestsread and write access to tenant repositories. -
Go to Organization settings > Secrets and variables > Actions.
-
On the Secrets tab, add the following encrypted values:
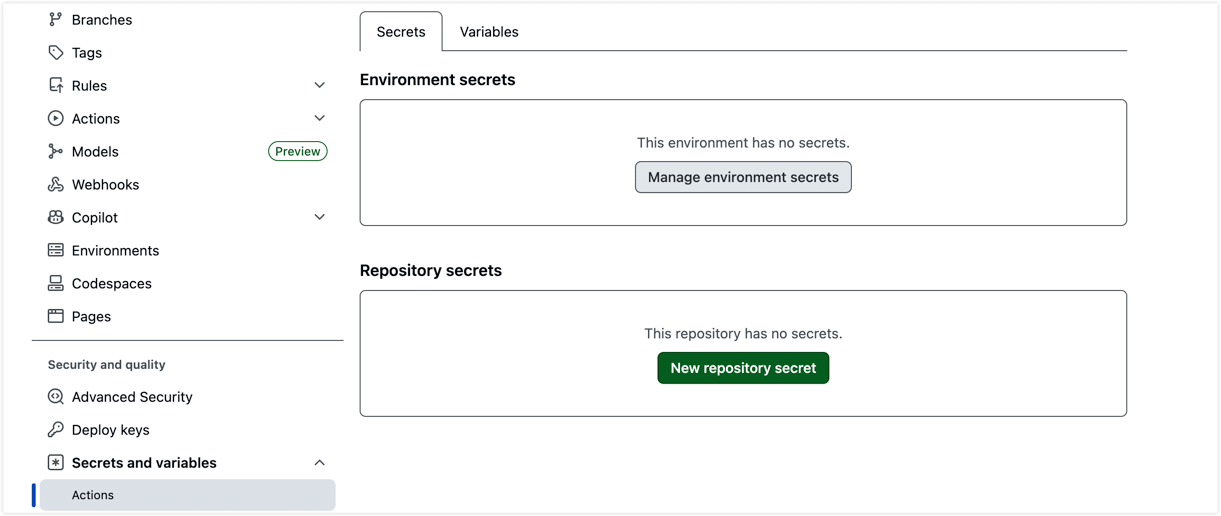
Secret name Description GH_DEPLOY_TOKENThe PAT created in the previous step. SIT_TAPDATA_ACCESS_CODEAccess code for the SIT TapData instance. PROD_TAPDATA_ACCESS_CODEAccess code for the production TapData instance. {ENV}_TAPDATA_ACCESS_CODEOptional. Add an access code for each intermediate environment you enable, such as DEV_TAPDATA_ACCESS_CODE.VAULT_ENCRYPTION_KEYOptional. Encrypts the generated vault.jsoncredential file. -
On the Variables tab, add the following plain-text values:
Variable name Example value SIT_TAPDATA_URLSIT environment URL, such as http://10.0.0.2:3030.PROD_TAPDATA_URLProduction environment URL. {ENV}_TAPDATA_URLOptional. Add a URL for each intermediate environment you enable, such as DEV_TAPDATA_URL.tipTo get a TapData access code, sign in to the corresponding TapData environment as an administrator and go to System Settings > User Management to view the user information. In some environments, the user can also copy the access code from Profile in the upper-right corner.
Step 3: Create Environments and configure connection values
-
In the tenant repository, go to Settings > Environments.
-
Create at least the
sit,prod, anddeployEnvironments. ThesitandprodEnvironments represent the SIT and production TapData environments. ThedeployEnvironment is the resource import approval gate. -
For
deploy, configure Required reviewers.The following image shows where to configure required reviewers for the
deployEnvironment.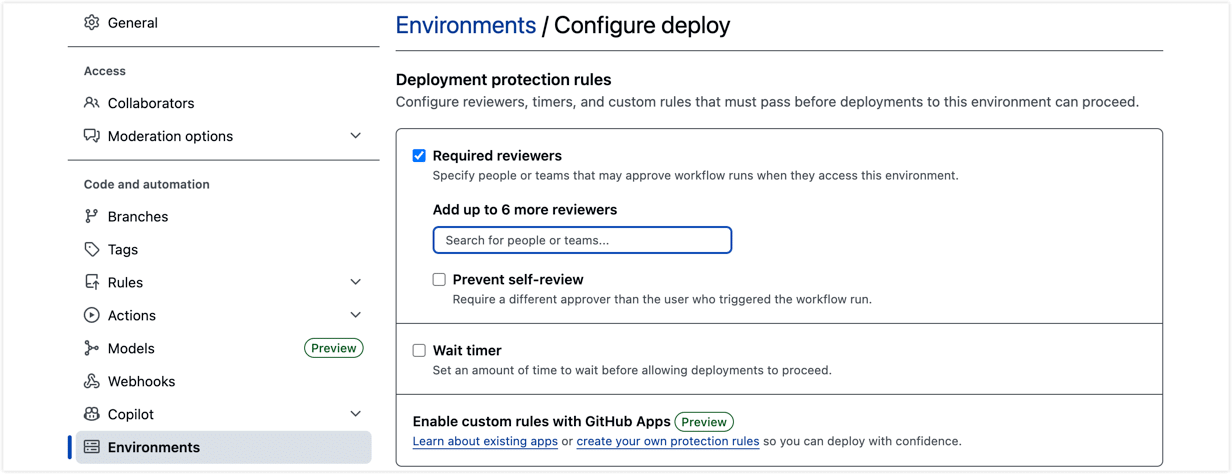
-
If user acceptance testing or production release approval also requires environment-level review, configure Required reviewers on the corresponding
aatorprodEnvironment. -
If your release process includes development validation, performance testing, or user acceptance testing, create the corresponding Environments.
-
Configure real connection values for the SIT, production, and any other enabled environments. Use one of the following formats:
- URI format: Use this format for databases such as MongoDB where the connection string includes the username and password. Store the value as a Secret named
{PREFIX}_URI, for exampleFDM_URI. - Host and port format: Use this format for databases such as PostgreSQL, Oracle, and MySQL. Store the address and username as Variables, and store the password as a Secret. Use names such as
{PREFIX}_URL,{PREFIX}_USER, and{PREFIX}_PASSWORD. For a TapData connection namedoracle_source, configureORACLE_SOURCE_URL,ORACLE_SOURCE_USER, andORACLE_SOURCE_PASSWORD.
cautionFor automated deployment with the default worker, avoid connection names that contain spaces or hyphens. For example, rename
oracle-sourcetooracle_sourcein TapData and export the project again before configuringORACLE_SOURCE_URL,ORACLE_SOURCE_USER, andORACLE_SOURCE_PASSWORD.If multiple connections can share the same fallback values, configure
DEFAULT_URL,DEFAULT_USER, andDEFAULT_PASSWORD. - URI format: Use this format for databases such as MongoDB where the connection string includes the username and password. Store the value as a Secret named
Step 4: Install a self-hosted runner
GitHub-hosted runners usually cannot access TapData services and databases in an internal network. Deploy at least one self-hosted runner on an internal Linux server. Register it at the organization level if you want multiple repositories to share it.
- In the GitHub organization, go to Settings > Actions > Runners, and click New self-hosted runner.
- On the prepared Linux server, follow the GitHub setup commands to download, register, and start the runner. Add the
tapdatalabel during registration. - Return to the Runners page and confirm that the runner status is
Idle. Verify that it has thetapdatalabel and can access the TapData service ports for all target environments.
Validate the setup
Before the first automated deployment, check the following items:
- The Worker repository is Internal and contains the deployment workflow, rollback workflow, and core scripts.
- The
{WORKER_REPO}placeholder in tenant repository workflows has been replaced with the real Worker repository path. - Organization-level Secrets and Variables include
GH_DEPLOY_TOKEN, TapData access codes, and TapData URLs for SIT and production. - The tenant repository contains the
sit,prod, anddeployEnvironments, plus any intermediate Environments that are enabled. - Connection values are configured for SIT, production, and other enabled environments according to the naming rules.
- At least one self-hosted runner is
Idle, has thetapdatalabel, and can access all target TapData environments.
After the checklist is complete, continue with Create and deploy a project to package TapData configuration and release it to a target environment.